
Table of Contents
- 1. Introduction: Why This Lemonade Pancake Recipe is a Game-Changer
- 2. How This Recipe Works: The Science Behind the Deliciousness
- 3. Ingredients and Smart Substitutions
- 4. Step-by-Step Instructions: Your Guide to Perfect Lemonade Pancakes
- 5. Expert Tips for Success
- 6. What to Serve With Your Lemonade Pancakes
- 7. Storing and Reheating Lemonade Pancakes
- 8. Frequently Asked Questions About Lemonade Pancakes
Introduction: Why This Lemonade Pancake Recipe is a Game-Changer
Imagine biting into a stack of pancakes so incredibly light, fluffy, and bursting with a bright, zesty tang that makes your taste buds sing. That, my friends, is the magic of these pancakes with lemonade. Forget everything you thought you knew about breakfast – these aren’t just any pancakes; they’re an experience. The first time I stumbled upon the idea of using lemonade in pancakes, I was skeptical, but one bite, and I was utterly convinced. It was like a sunny morning in pancake form, a revelation that instantly brightened my day. The subtle sweetness perfectly balanced with that signature lemon zing creates a breakfast sensation that’s truly unforgettable. You really need to try this recipe. For more incredible breakfast ideas you can see more easy recipes here that will transform your mornings.
What makes this specific pancakes with lemonade recipe stand out? It’s not just the unique flavor profile; it’s the unparalleled texture. We’re talking cloud-like fluffiness that practically melts in your mouth, achieved through a clever interplay of ingredients. This isn’t just a recipe; it’s a culinary journey to a brighter breakfast, and I’m thrilled to share every delicious detail with you.
How This Recipe Works: The Science Behind the Deliciousness
- Achieving Fluffy Texture with Lemonade’s Acidity: The acidity in lemonade isn’t just for flavor; it’s a crucial player in achieving that incredible fluffiness. When combined with baking soda, it creates a powerful leavening reaction, producing carbon dioxide gas bubbles that get trapped in the batter, giving our pancakes their lofty rise.
- Balancing Sweetness and Tang for a Perfect Bite: This recipe meticulously balances the inherent sweetness of classic pancakes with the vibrant tang of lemonade. We’re not just adding lemon; we’re crafting a harmonious flavor profile that’s neither too tart nor too sugary, ensuring every bite is perfectly enjoyable.
- The Power of Baking Soda and Lemonade Interaction: This dynamic duo is the secret sauce! Baking soda needs an acid to react, and lemonade provides that acid beautifully. This reaction happens quickly, so it’s important not to overmix and to cook the batter relatively soon after combining to maximize the leavening effect. For a deeper dive into the science of baking, I often refer to resources like King Arthur Baking’s extensive guides on leavening agents.
- Melted Butter for Moisture and Richness: Unlike some recipes that use oil, melted butter adds a depth of flavor and an incomparable tenderness to the crumb of these pancakes, making them truly irresistible.
Ingredients and Smart Substitutions
Here is what you need and why:
All-Purpose Flour: This is the workhorse of our pancake batter, providing the structure. I always prefer unbleached all-purpose flour for a slightly better flavor and texture. For an even lighter, more delicate crumb, you can substitute about 2 tablespoons of cornstarch for 2 tablespoons of the all-purpose flour.
Granulated Sugar: Enhances the overall sweetness and helps with browning. It also plays a role in the structure of the pancake. If you prefer less sweetness, you can slightly reduce the amount, but be mindful it might affect the browning.
Baking Powder & Baking Soda: The ultimate leavening dream team! Baking powder works as a double-acting leavening agent, while baking soda reacts swiftly with the acidity in the lemonade and buttermilk to create an immediate lift, ensuring those gorgeous, fluffy centers.
Salt: A pinch of salt is essential for flavor balance. It amplifies the other flavors and prevents the pancakes from tasting bland. Don’t skip it!
Lemonade: The Star Ingredient (Homemade vs. Store-Bought): This is where the magic happens! Use a good quality lemonade. If you have time, homemade lemonade will provide the freshest, most vibrant lemon flavor. If using store-bought, opt for one that isn’t overly sweet or watered down. The acidity is key here!
Milk: Adds moisture and tenderness to the pancakes. I typically use whole milk for richness, but 2% milk works perfectly fine. For an even richer pancake, you can sometimes substitute buttermilk for a portion of the milk, allowing its acidity to further interact with the baking soda.
Egg: Acts as a binder, holding everything together, and contributes to the richness and tender texture of the pancakes. A large egg is standard here.
Melted Butter (or Oil): Butter imparts a beautiful, rich flavor and helps create those tender crumbs with golden, crispy edges. If you’re out of butter, a neutral oil like canola or vegetable oil can be used, but you’ll lose a bit of that buttery depth.
How to Make Pancakes with Lemonade
Follow these step-by-step instructions for perfect pancakes with lemonade:
1. Prepare Your Batter: Mixing Wet and Dry Ingredients
In a large bowl, whisk together the all-purpose flour, granulated sugar, baking powder, baking soda, and salt until well combined. In a separate medium bowl, whisk together the lemonade, milk, egg, and melted butter until thoroughly blended. Pour the wet ingredients into the dry ingredients. Stir just until combined. It’s crucial not to overmix! A few lumps are perfectly fine and even desired for tender pancakes.
2. Heat Your Pan: The Key to Even Cooking
Place a large non-stick griddle or cast-iron skillet over medium heat. Lightly grease it with butter or oil. The pan is ready when a drop of water flicked onto the surface dances and evaporates quickly. If it smokes immediately, it’s too hot; if it just sits there, it’s not hot enough. Consistent heat is vital for evenly golden-brown pancakes.
3. Pour and Cook: The Pancake Flip Technique
Pour about 1/4 cup of batter per pancake onto the hot pan, leaving some space between each. Cook for 2-3 minutes, or until bubbles appear on the surface and the edges look set. Gently slide a thin spatula underneath and flip the pancake. Cook for another 1-2 minutes on the second side, until golden brown and cooked through. Repeat with the remaining batter, adjusting heat as needed.
4. Serving Suggestions: Making Them Your Own
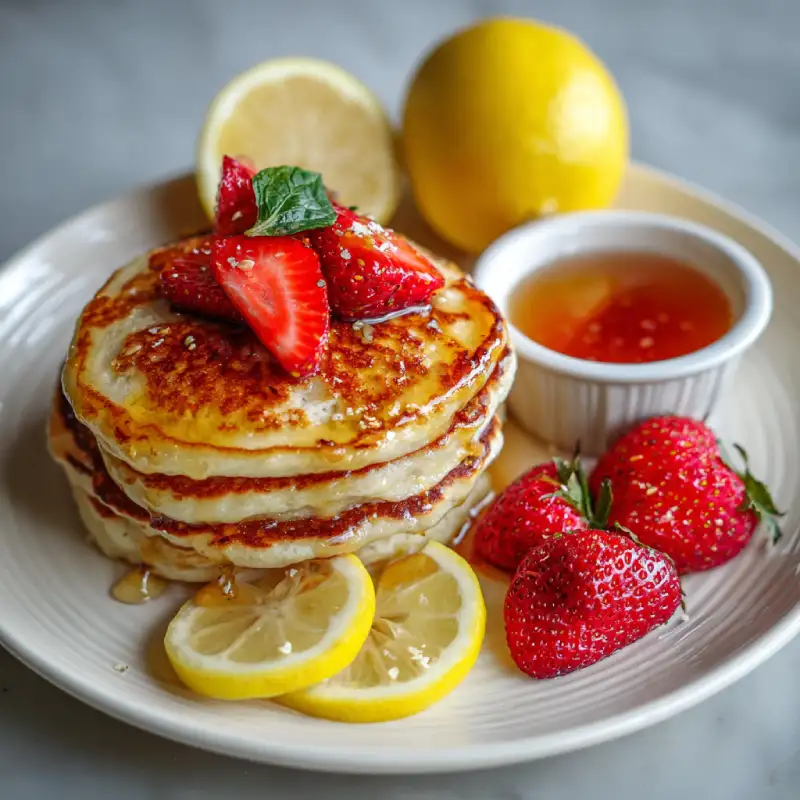
Serve your warm lemonade pancakes immediately! Stack them high and top with your favorite accompaniments. Think about a drizzle of maple syrup (maybe infused with a little extra lemon zest!), a dollop of whipped cream and fresh berries, or simply a dusting of powdered sugar. The possibilities are endless!
Expert Tips for Success
- Do Not Overmix the Batter (Lumpy is Good!): Seriously, this is the most common pancake mistake. Overmixing develops the gluten in the flour, leading to tough, chewy pancakes instead of light, fluffy ones. Stop stirring as soon as the wet and dry ingredients are just incorporated.
- Let the Batter Rest for 10 Minutes: This allows the flour to fully hydrate and the leavening agents to begin their work, resulting in a more tender and uniformly risen pancake.
- Use the Right Pan Temperature: Maintain consistent medium heat. Too low, and they’ll be pale and dry; too high, and they’ll burn on the outside before cooking through.
- How to Tell When to Flip Your Pancakes: Look for bubbles forming and popping on the surface of the pancake, and for the edges to appear slightly dry and set. This is your cue!
- Keeping Pancakes Warm While You Cook the Rest: As you cook batches, place the finished pancakes on a wire rack set on a baking sheet in a warm oven (around 200°F/95°C) to keep them warm without getting soggy.
What to Serve With Your Lemonade Pancakes
These pancakes with lemonade are incredibly versatile and delicious on their own, but a few thoughtful additions can really elevate the experience:
- Classic Maple Syrup (with a twist!): A generous drizzle of good quality maple syrup is always a winner. For an extra pop of lemon, warm the syrup gently and stir in a teaspoon of fresh lemon zest before serving.
- Fresh Berries and Whipped Cream: The tartness of raspberries, sweetness of strawberries, or the subtle flavor of blueberries all pair beautifully with the lemon. A dollop of freshly whipped cream adds a luxurious touch.
- Lemon Zest and Powdered Sugar: For a simple yet elegant finish, a dusting of powdered sugar and a sprinkle of fresh lemon zest enhances the inherent lemon flavor without overpowering it.
- A Side of Crispy Bacon or Sausage: The savory, salty crunch of bacon or the spiced goodness of breakfast sausage provides a wonderful contrast to the bright, sweet pancakes.
Storing and Reheating Lemonade Pancakes
Making a big batch of these pancakes with lemonade means deliciousness anytime! Here’s how to store and reheat them:
- Storing Cooked Pancakes in the Refrigerator: Once completely cooled, stack the pancakes with parchment paper between each to prevent sticking. Place them in an airtight container or a large zip-top bag and refrigerate for up to 3-4 days.
- Freezing Pancakes for Later: For longer storage, freeze them! Arrange cooled pancakes in a single layer on a baking sheet and freeze until solid (about 30 minutes to an hour). This prevents them from sticking together. Once solid, transfer them to a freezer-safe zip-top bag or airtight container, again separating layers with parchment paper. They will keep well for up to 2-3 months.
- Best Ways to Reheat Pancakes:
- Microwave: Quickest method. Reheat 1-2 pancakes at a time for 30-60 seconds, or until warm. Be careful not to overdo it, or they can become rubbery.
- Toaster or Toaster Oven: My preferred method for crispy edges! Toast frozen or refrigerated pancakes on a medium setting until heated through and lightly crisped.
- Oven: For larger batches, preheat your oven to 350°F (175°C). Place pancakes in a single layer on a baking sheet, cover loosely with foil, and heat for about 5-10 minutes, or until warm.
Frequently Asked Questions About Lemonade Pancakes
Can I use diet lemonade?
Why are my pancakes flat?
Can I make these gluten-free?
What’s the best type of pan to use?
Can I add fruit to the batter?
Lemonade Pancakes
- Total Time: 35 minutes
- Yield: 12 pancakes
Description
Fluffy, tangy, and irresistibly zesty pancakes made with real lemonade for an extraordinary breakfast. These pancakes are a delightful twist on a classic, offering a bright flavor that will wake up your taste buds.
Ingredients
- 1 ½ cups all-purpose flour
- 2 tablespoons granulated sugar
- 1 ½ teaspoons baking powder
- ½ teaspoon baking soda
- ¼ teaspoon salt
- 1 cup lemonade (good quality, homemade or store-bought)
- ½ cup milk (whole or 2%)
- 1 large egg
- ¼ cup unsalted butter, melted
- Butter or oil for greasing the pan
Instructions
- Step 1: Combine Dry Ingredients. In a large bowl, whisk together the flour, granulated sugar, baking powder, baking soda, and salt.
- Step 2: Combine Wet Ingredients. In a separate medium bowl, whisk together the lemonade, milk, egg, and melted butter until well blended.
- Step 3: Mix Batter. Pour the wet ingredients into the dry ingredients. Stir gently with a spoon or whisk until just combined. A few lumps are fine! Do not overmix. Let stand for 10 minutes.
- Step 4: Heat Pan. Heat a lightly greased griddle or large non-stick skillet over medium heat.
- Step 5: Cook Pancakes. Pour about ¼ cup of batter per pancake onto the hot pan. Cook for 2-3 minutes per side, until golden brown and cooked through, with bubbles forming on the surface before flipping.
- Step 6: Serve. Serve warm with your favorite toppings.
- Prep Time: 15 mins
- Cook Time: 20 mins