
Introduction: My Journey to the Perfect Whole Grain Mini Loaf
As a seasoned food blogger with a deep love for all things baked, I’ve spent countless hours in my kitchen, experimenting with flours, fats, and sweeteners to create treats that are both wholesome and utterly delicious. My quest often leads me to explore how to infuse classic comforts with healthful benefits without sacrificing flavor or texture. Today, I’m thrilled to share a recipe that truly stands out in my repertoire: the ultra whole grain mini loaf. Imagine a bite that’s perfectly moist, bursting with rich, nutty whole-grain flavor, and oh-so-tender. This isn’t just another bread; it’s a testament to how incredible whole grains can be, proving that healthy eating can also be incredibly indulgent. It’s a game-changer! For more baking adventures, you can see more good recipes here.
Why This Whole Grain Mini Loaf is a Game Changer
This mini loaf recipe isn’t just good; it’s revolutionary. It redefines what you expect from whole-grain baking, delivering a product that’s far from the dry, dense, or bland stereotypes. It’s incredibly adaptable, fits beautifully into any meal plan, and satisfies both the health-conscious and the flavor-driven palate.
What Makes This Recipe Stand Out
What sets this recipe apart is its meticulous balance of ingredients and techniques, ensuring optimum moisture, a complex flavor profile, and an irresistible texture. It’s designed to be foolproof, even for novice bakers, and yields consistently impressive results every single time.
How This Mini Loaf Recipe Works
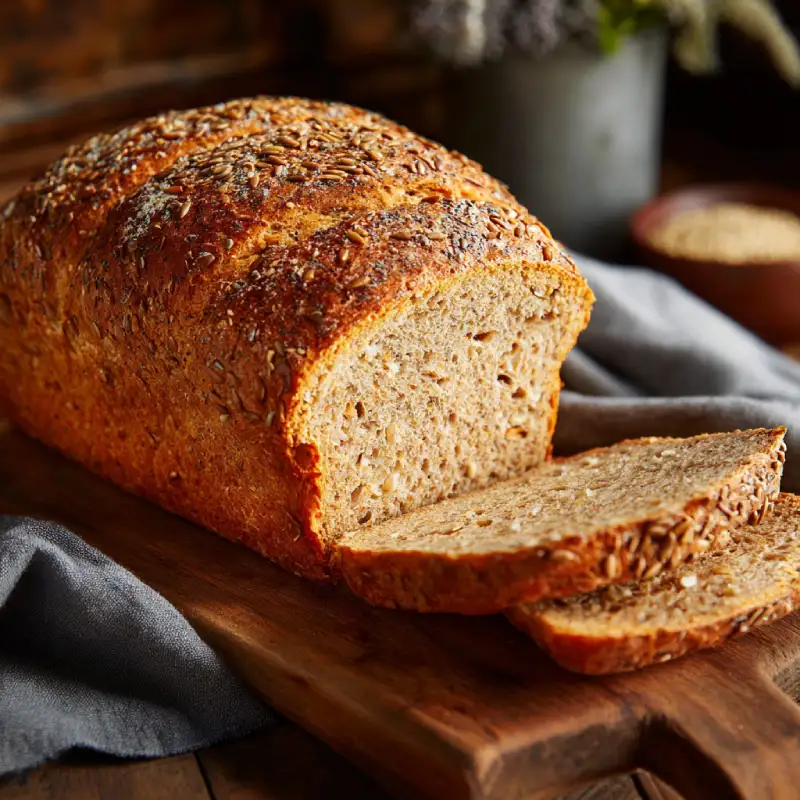
- Perfectly Moist Crumb, Never Dry: The secret lies in a careful balance of liquids and fats, along with specific whole grain flours that retain moisture, giving you a tender crumb that melts in your mouth.
- Robust Whole Grain Flavor, Not Bland: We go beyond just whole wheat, incorporating other healthful grains to build layers of complex, earthy, and slightly sweet notes that truly sing.
- Tender Texture with a Hint of Chew: This isn’t cardboard! The combination of leavening agents and gentle mixing creates a loaf that’s light yet substantial, with a delightful chew.
- Easy to Scale for Multiple Loaves: The beauty of mini loaves is their individual serving size, and this recipe is incredibly forgiving if you want to bake a big batch for gifting or meal prep.
Ingredients and Smart Substitutions
Here is what you need and why:
Whole Wheat Flour (Why ‘Whole’ Matters): Forget bland, dense whole wheat. Using 100% whole wheat flour ensures you get all the nutritional benefits—fiber, vitamins, and minerals—from the entire wheat kernel. For a slightly lighter texture, you can use white whole wheat flour, which has a milder flavor and finer grind while still being 100% whole grain. It’s the backbone of our See more easy recipes and our lovely ultra whole grain mini loaf.
Other Whole Grains (Oats, Spelt – Adding Layers of Flavor): To elevate the flavor and texture profile, I love incorporating rolled oats for a subtle chew and earthy flavor. Spelt flour, another ancient grain, can also be added for a slightly nutty, sweeter note, bringing even more depth to your ultra whole grain mini loaf. A blend often yields the best results!
Sweeteners (Maple Syrup vs. Honey vs. Brown Sugar): For natural sweetness and moisture, pure maple syrup is my go-to, offering a delicate, complex flavor. Honey works beautifully as a direct substitute, lending a distinct floral note. If you prefer a richer, molasses-like undertone, light brown sugar is an excellent choice, contributing to a wonderfully moist crumb.
Fats (Olive Oil vs. Melted Coconut Oil vs. Applesauce): Healthy fats are crucial for moisture and tenderness. Light olive oil provides an almost undetectable, healthful fat that keeps the loaves incredibly moist. Melted coconut oil can be used for a slightly tropical aroma. For a lower-fat option, unsweetened applesauce can replace some or all of the oil, keeping the loaves moist but watch for a slightly denser texture.
Leavening Agents (Baking Soda & Powder – The Science Behind the Rise): This recipe employs both baking soda and baking powder. Baking soda reacts with acidic ingredients (like buttermilk or yogurt) to create lift, while baking powder provides consistent lift on its own, ensuring a beautifully risen, tender ultra whole grain mini loaf. It’s a precise scientific dance for optimal texture.
Dairy vs. Non-Dairy Alternatives (Milk, Yogurt, Buttermilk): For ultimate moisture and a tender crumb, buttermilk is fantastic due to its acidity. If you don’t have it, you can make a sour milk substitute by adding a tablespoon of lemon juice or vinegar to dairy milk and letting it sit for 5 minutes. Plain yogurt (dairy or non-dairy) or your favorite plant-based milk (almond, oat) also work wonderfully, providing essential liquid and contributing to richness.
Flavor Boosters (Nuts, Seeds, Dried Fruit, Spices): This is where you can truly make the ultra whole grain mini loaf your own! Think chopped walnuts or pecans for crunch, sunflower or pumpkin seeds for extra nutrition, dried cranberries or chopped apricots for bursts of sweetness, or warm spices like cinnamon, nutmeg, and ginger for an aromatic experience.
Step-by-Step Instructions: Your Visual Baking Guide
Follow these step-by-step photos:
1. Prep Your Pans and Oven
Preheat your oven to 350°F (175°C). Grease and flour a mini loaf pan (or line with paper inserts). Ensuring your oven is at the correct temperature from the start is crucial for proper leavening.
2. Mix Dry Ingredients: The Foundation
In a large bowl, whisk together the whole wheat flour, other whole grains (if using), baking powder, baking soda, salt, and any dry spices (like cinnamon). Whisking ensures all ingredients are evenly distributed, preventing pockets of leavening agents and ensuring a uniform rise.
3. Combine Wet Ingredients: Achieving Balance
In a separate medium bowl, whisk together the maple syrup (or other sweetener), olive oil (or other fat), eggs, vanilla extract, and buttermilk (or alternative). Whisk until thoroughly combined and smooth. This ensures the wet ingredients are well-incorporated before meeting the dry.
4. Gentle Mixing: Avoiding Overworking the Dough
Pour the wet ingredients into the dry ingredients. Using a spatula, gently fold until just combined. A few streaks of flour are okay! Overmixing develops gluten, leading to a tough, dry loaf. If adding nuts, seeds, or dried fruit, fold them in at this stage.
5. Fill Mini Loaf Pans Evenly
Divide the batter evenly among the prepared mini loaf cavities, filling each about two-thirds full to allow for proper rising. An ice cream scoop or measuring cup can help with even distribution.
6. Baking for Golden Perfection
Bake for 20-25 minutes, or until the tops are golden brown and a toothpick inserted into the center of a loaf comes out clean. Baking times can vary based on your oven, so keep an eye on them. The aroma will be incredible!
7. Cooling Properly: The Key to Texture
Remove the mini loaves from the oven and let them cool in the pan for 5-10 minutes before carefully transferring them to a wire rack to cool completely. Cooling on a rack prevents the bottoms from becoming soggy and allows the texture to set properly.
Expert Tips for Success Every Time
- Don’t Overmix the Batter: I can’t stress this enough! Overmixing develops gluten, which leads to a tough, rubbery loaf. Mix until just combined.
- Use a Kitchen Scale for Accuracy: Measuring flours by weight (grams) instead of volume (cups) is far more accurate and ensures consistent results every time for your ultra whole grain mini loaf.
- Adjust Baking Time for Your Oven: Ovens vary widely. Always start checking for doneness a few minutes before the recipe states.
- Check for Doneness: The Toothpick Test: Insert a toothpick into the center of a loaf. If it comes out clean or with a few moist crumbs, it’s done. If it has wet batter, continue baking for a few more minutes.
- The Importance of Resting Time: Don’t slice into warm loaves immediately! Letting them cool completely on a wire rack allows the internal structure to set, resulting in a better texture.
What to Serve With Your Ultra Whole Grain Mini Loaf
Breakfast Pairings (Yogurt, Fruit, Coffee)
These mini loaves are absolutely delightful with your morning coffee or tea. Enjoy them alongside a dollop of Greek yogurt and fresh berries for a truly satisfying start to your day. The subtle sweetness and hearty texture make them perfect with a vibrant fruit salad.
Snack Time Delights (Nut Butter, Jam, Cheese)
For a quick and nourishing snack, slice a mini loaf and slather it with your favorite almond butter or a homemade fruit jam. A smear of cream cheese or even a mild cheddar can also create a surprisingly delicious sweet and savory combination.
Savory Options (Soups, Salads)
Don’t just think sweet! These versatile ultra whole grain mini loaves make an excellent accompaniment to a light lunch. Serve them alongside a warm bowl of lentil soup or a fresh, crisp salad for an added layer of flavor and substance. Slice them thinner, toast lightly, and use as croutons!
Storing and Reheating Your Mini Loaves
Room Temperature Storage Best Practices
Your ultra whole grain mini loaves will stay fresh at room temperature for up to 3-4 days. Store them in an airtight container or wrapped tightly in plastic wrap to prevent them from drying out. Avoid refrigerating, as this can often make baked goods stale faster.
Freezing for Longer Shelf Life
These loaves freeze beautifully! Once completely cooled, wrap each mini loaf individually in plastic wrap, then place them in a freezer-safe bag or container. They can be frozen for up to 3 months. This is perfect for meal prepping healthy snacks or having a quick breakfast on hand.
Reheating Tips for Optimal Freshness
To reheat from frozen, simply unwrap and let them thaw at room temperature for an hour or so, or microwave for 30-60 seconds until warm. For a crispier exterior, you can warm them in a preheated oven at 300°F (150°C) for 5-10 minutes.
Frequently Asked Questions About Whole Grain Loaves
Can I use different types of whole grain flour?
How do I prevent my mini loaves from sticking?
Can this recipe be made into a large loaf?
Is this recipe suitable for dietary restrictions (gluten-free, vegan)?
What’s the best way to add mix-ins?
Ultra Whole Grain Mini Loaves
- Total Time: 19 minute
- Yield: 12 mini loaves
Description
These delightful ultra whole grain mini loaves are perfectly moist, subtly sweet, and packed with wholesome goodness. They’re a versatile treat, ideal for breakfast, snacks, or even a light dessert, proving that healthy can be utterly delicious.
Ingredients
- 1 ½ cups (180g) 100% whole wheat flour
- ½ cup (50g) rolled oats (or spelt flour)
- 2 teaspoons baking powder
- ½ teaspoon baking soda
- ½ teaspoon salt
- ½ teaspoon ground cinnamon (optional)
- ½ cup (120ml) pure maple syrup (or honey/brown sugar)
- ⅓ cup (80ml) light olive oil (or melted coconut oil/applesauce)
- 2 large eggs
- 1 teaspoon vanilla extract
- ¾ cup (180ml) buttermilk (or plain yogurt/plant-based milk)
- Optional: ½ cup chopped nuts, seeds, or dried fruit
Instructions
- 1. Prepare Oven & Pans: Preheat oven to 350°F (175°C). Grease and flour a 12-cavity mini loaf pan or line with paper inserts.
- 2. Combine Dry Ingredients: In a large bowl, whisk together whole wheat flour, oats (or spelt), baking powder, baking soda, salt, and cinnamon (if using).
- 3. Mix Wet Ingredients: In a separate medium bowl, whisk together maple syrup, olive oil, eggs, and vanilla extract until smooth. Stir in the buttermilk.
- 4. Gently Combine: Pour the wet ingredients into the dry ingredients. Using a spatula, gently fold until just combined. Do not overmix. If adding mix-ins, fold them in now.
- 5. Fill Pans: Divide the batter evenly among the prepared mini loaf cavities, filling each about two-thirds full.
- 6. Bake: Bake for 20-25 minutes, or until the tops are golden brown and a toothpick inserted into the center comes out clean.
- 7. Cool: Let the mini loaves cool in the pan for 5-10 minutes, then transfer to a wire rack to cool completely before serving.
- Prep Time: 15 mins
- Cook Time: 20-25 mins