
Table of Contents
- Fuel Your Day: A High Protein Chili You’ll Actually Crave
- Why This High Protein Chili Works
- Essential Ingredients & Smart Substitutions
- Step-by-Step: Crafting Your High Protein Chili
- Expert Tips for a Chili Masterpiece
- Perfect Pairings: What to Serve With Your Chili
- Storing & Reheating Your Leftovers
- High Protein Chili FAQ
Fuel Your Day: A High Protein Chili You’ll Actually Crave
Imagine a bowl of something rich, deeply flavored, and utterly satisfying that doesn’t just fill you up, but actually powers you through your day. That, my friends, is exactly what this high protein chili delivers. It’s hearty, packed with robust flavors, and boasts a texture that perfectly balances tender beans with succulent meat (or plant-based goodness!). Protein-packed meals aren’t just a trend; they’re a game-changer for sustained energy, muscle repair, and keeping hunger at bay. For years, I struggled to find meals that were both delicious and truly kept me full. Too often, ‘healthy’ meant bland, and ‘satisfying’ meant compromising my health goals. But then, this high protein chili entered my life. It transformed my meal planning, becoming a consistent, crave-worthy staple that I look forward to making and eating. It’s truly a recipe you’ll actually crave! For more amazing and easy-to-follow recipes, you can always See more easy recipes here.
Why This High Protein Chili Works
- Rich, savory depth from multiple protein sources: We don’t just rely on one protein here. The combination of lean meat and diverse beans creates an incredible depth of flavor and ensures every spoonful is packed with goodness.
- Balanced texture with tender beans and hearty meat: Forget watery or overly thick chili. This recipe hits the sweet spot with tender, perfectly cooked beans and substantial chunks of savory meat, offering a satisfying mouthfeel.
- A symphony of spices creating warmth, not just heat: While you can absolutely dial up the spice, the real magic here is in the aromatic blend of chili powder, cumin, and smoked paprika. They create a comforting warmth that envelops your senses without being overwhelmingly hot.
- One-pot wonder for easy cleanup: Who loves doing dishes? Not me! This entire masterpiece comes together in a single pot, minimizing cleanup and maximizing your enjoyment.
Essential Ingredients & Smart Substitutions
Here is what you need and why:
Lean Ground Turkey/Beef: This forms the primary protein base for our high protein chili. Lean ground turkey gives a lighter flavor, while lean ground beef offers a richer, more traditional chili experience. Both are excellent sources of complete protein and essential nutrients. Make sure to brown it well for optimal flavor development.
Variety of Beans (Black, Kidney, Pinto): These aren’t just for texture; they’re powerhouses! Beans add significant plant-based protein, fiber, and important minerals. The combination of black, kidney, and pinto beans brings different textures and a more complex flavor profile to the chili. Feel free to use your favorite blend or whatever you have on hand.
Canned Crushed & Diced Tomatoes: These are the backbone of our chili’s robust flavor. Crushed tomatoes provide a smooth, rich base, while diced tomatoes add chunks of tomato and a bit more texture. They contribute acidity and umami, balancing the other flavors beautifully.
Chicken/Beef Broth: Essential for achieving the right consistency and enhancing the overall flavor. Broth adds foundational liquid and depths of savory notes that water simply can’t. Choose low-sodium options to control the salt content of your dish.
Chili Powder, Cumin, Smoked Paprika: This is our core spice blend, creating that quintessential chili flavor. Chili Powder brings warmth and complexity, Cumin offers an earthy, pungent note, and Smoked Paprika delivers a beautiful smoky aroma that sets this chili apart. Don’t be afraid to adjust these to your personal taste.
Onion, Bell Peppers, Garlic: These aromatic vegetables form the flavor foundation. Sautéing them first builds a delicious base for the entire dish, layering in sweetness, pungency, and a classic savory depth.
Optional: Protein Powder (Unflavored): For an extra protein boost without altering the taste or texture, you can stir in a scoop or two of unflavored whey or plant-based protein powder at the very end of cooking. It dissolves seamlessly and provides an undetectable nutritional upgrade, especially if you’re chasing specific macros. Learn more about different protein types for cooking.
Other potential substitutes for dietary needs: For a vegan option, swap meat for additional beans, lentils, or a plant-based ground substitute. For gluten-free, ensure your broth is certified GF. For less sodium, opt for reduced-sodium broth and adjust salt to taste.
Step-by-Step: Crafting Your High Protein Chili
Follow these step-by-step instructions to create your ultimate high protein chili:
1. Sauté Aromatics & Brown Meat
Heat a large pot or Dutch oven over medium-high heat. Add a tablespoon of olive oil. Once shimmering, add the chopped onion and bell peppers. Sauté for 5-7 minutes until softened and translucent. Add the minced garlic and cook for another minute until fragrant. Push the vegetables to one side of the pot, then add your lean ground turkey or beef. Break it apart with a spoon and brown thoroughly, stirring occasionally, until no pink remains. Drain any excess fat.
2. Add Tomatoes, Broth, and Spices
Stir the browned meat and sautéed aromatics together. Pour in the crushed tomatoes, diced tomatoes (undrained), and chicken or beef broth. Add the chili powder, cumin, smoked paprika, dried oregano, salt, and black pepper. Stir everything well to combine, scraping up any browned bits from the bottom of the pot. Bring the mixture to a gentle simmer.
3. Incorporate Beans and Simmer
Once simmering, add the rinsed and drained black, kidney, and pinto beans. Stir them into the chili. Reduce the heat to low, cover the pot, and let the chili simmer for at least 30 minutes, or up to 2 hours, stirring occasionally. The longer it simmers, the more the flavors will meld and deepen.
4. (Optional) Stir in Unflavored Protein Powder
If you’re using unflavored protein powder for an extra boost, remove the chili from the heat. Stir in 1-2 scoops of protein powder until fully dissolved and no clumps remain. It will seamlessly integrate without affecting the chili’s flavor or texture.
5. Adjust Seasoning and Serve
Taste the chili and adjust seasonings as needed. You might want more salt, a pinch of cayenne for extra heat, or another dash of smoked paprika. Ladle hot chili into bowls and serve with your favorite toppings!
Expert Tips for a Chili Masterpiece
- Don’t skip browning the meat for flavor development: This step creates rich, savory depth through the Maillard reaction. Bits of caramelized meat at the bottom of the pot are pure flavor gold.
- Adjust spice levels to your preference: The chili powder measurement is a guideline. If you like it hotter, add a pinch of cayenne pepper or a dash of hot sauce during the simmer. For milder chili, reduce the chili powder.
- A longer simmer equals deeper flavor: While 30 minutes is enough, letting your chili gently simmer for 1-2 hours (or even longer on very low heat) allows the flavors to truly meld, soften, and become incredibly complex.
- Taste and adjust salt at the end: Broths and canned goods vary in sodium content. It’s always best to add salt incrementally at the end of cooking to avoid over-salting.
- Rinse your canned beans thoroughly: Rinsing beans removes excess sodium and helps prevent a metallic taste, ensuring pure, clean bean flavor.
Perfect Pairings: What to Serve With Your Chili
This high protein chili is fantastic on its own, but these additions elevate the experience:
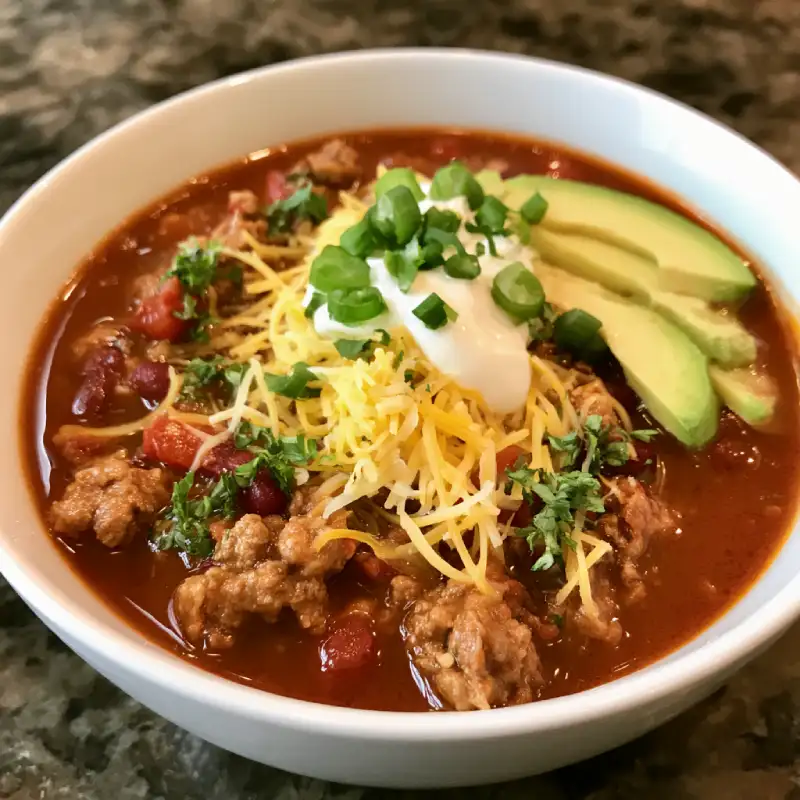
- Classic toppings: A dollop of plain Greek yogurt (for extra protein and a cooling counterpoint), shredded cheddar or Monterey Jack cheese, and thinly sliced green onions are always winners.
- Side dishes: Fluffy cornbread, a simple side of white or brown rice, or fresh avocado slices add great texture and balance.
- Crunchy options: A handful of sturdy tortilla chips or a few saltine crackers provide a satisfying crunch to each spoonful.
Storing & Reheating Your Leftovers
One of the best things about this high protein chili is how well it stores, making it perfect for meal prep!
- Refrigeration guidelines for freshness: Store cooled chili in an airtight container in the refrigerator for up to 3-4 days. The flavors often deepen overnight!
- Freezing instructions for meal prep: For longer storage, freeze chili in individual portions in freezer-safe containers or bags for up to 3 months. Thaw overnight in the refrigerator before reheating.
- Best methods for reheating without compromising texture: Reheat chili gently on the stovetop over medium-low heat, stirring occasionally, until heated through. You can also microwave individual portions, stirring halfway through. Add a splash of broth or water if it seems too thick after reheating.
High Protein Chili FAQ
How can I make this chili spicier?
Can I make this chili vegetarian/vegan?
What’s the best way to thicken my chili?
How long does high protein chili last?
Delicious High Protein Chili
- Total Time: 1 hour
- Yield: 6-8 servings
Description
Fuel your day with this robust and satisfying high protein chili. Packed with flavor and wholesome ingredients, it’s a meal you’ll truly crave.
Ingredients
- 1 tbsp olive oil
- 1 large onion, chopped
- 1 bell pepper (any color), chopped
- 3 cloves garlic, minced
- 1 lb lean ground turkey or beef
- 1 (28 oz) can crushed tomatoes
- 1 (14.5 oz) can diced tomatoes, undrained
- 1 (15 oz) can black beans, rinsed and drained
- 1 (15 oz) can kidney beans, rinsed and drained
- 1 (15 oz) can pinto beans, rinsed and drained
- 1.5 cups chicken or beef broth (low sodium preferred)
- 2 tbsp chili powder
- 1 tbsp ground cumin
- 1 tsp smoked paprika
- 0.5 tsp dried oregano
- 0.5 tsp salt (or to taste)
- 0.25 tsp black pepper (or to taste)
- Optional: 1-2 scoops unflavored protein powder
Instructions
- Heat olive oil in a large pot or Dutch oven over medium-high heat. Sauté onion and bell pepper for 5-7 minutes until softened. Add garlic and cook for 1 minute until fragrant.
- Push vegetables to one side, add ground meat, and brown thoroughly, breaking it apart, until no pink remains. Drain any excess fat.
- Stir meat and vegetables together. Add crushed tomatoes, diced tomatoes, broth, chili powder, cumin, smoked paprika, oregano, salt, and pepper. Stir well.
- Bring to a gentle simmer, then add the rinsed and drained beans. Stir to combine.
- Reduce heat to low, cover, and simmer for at least 30 minutes, or up to 2 hours, stirring occasionally.
- (Optional) Remove from heat and stir in unflavored protein powder until dissolved.
- Taste and adjust seasoning as needed before serving hot with your favorite toppings.
- Prep Time: 15 mins
- Cook Time: 45 mins