
Table of Contents
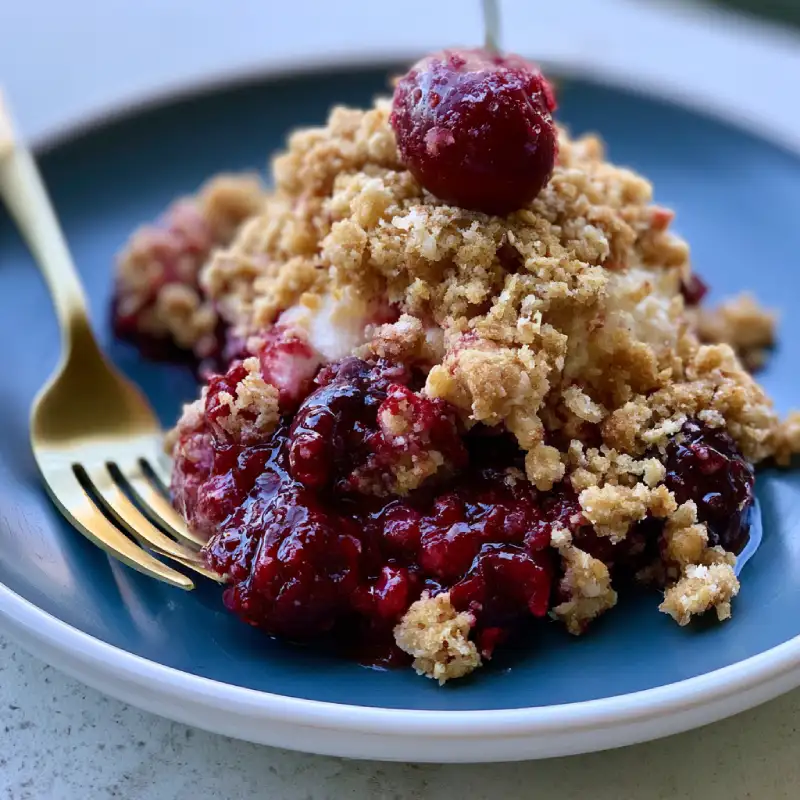
Cherry crisp with frozen cherries is a dessert that brings joy with every single spoonful! Imagine sinking your teeth into a vibrant, juicy cherry filling that’s perfectly nestled beneath a golden, crunchy oat topping. The aroma alone is enough to transport you to a cozy kitchen, and the taste? Divine! It’s that wonderful balance of sweet and tart, with a delightful interplay of textures – a truly comforting and unforgettable treat. And the best part? It’s surprisingly simple to make, even for novice bakers. If you’re looking for more delightful and easy dessert ideas, be sure to check out See more easy recipes for inspiration!
Why This Cherry Crisp Recipe Works
- Thick, not watery, cherry filling every time: Our secret combination of cornstarch and the magic of frozen fruit ensures a luscious, spoonable filling that won’t run all over your plate.
- Optimal crisp topping that stays crunchy: We’ve perfected the ratio of butter, oats, and flour, making sure your topping remains beautifully crisp, not soggy, delivering that satisfying crumble in every bite.
- Perfectly balanced sweet and tart flavor: Using a mix of sweeteners and a touch of almond extract elevates the natural tartness of the cherries into a harmonious symphony of flavors, making it irresistible.
- Deliciously easy with frozen cherries: By starting with frozen cherries, you save time on pitting and get a fantastic texture without any extra fuss, making this recipe accessible and reliable.
Ingredients and Smart Substitutions
Here is what you need and why:
Frozen Cherries: The star of our show! Using frozen cherries is a game-changer for this crisp. There’s no need to thaw them first; in fact, skipping the thaw helps prevent a watery filling. As they bake, they release their moisture slowly, allowing the thickener to do its job effectively. Any variety of frozen cherries will work beautifully, though dark sweet cherries will give you a milder tartness than sour cherries.
Sweeteners: We use a combination for the best results. Granulated sugar is for the cherry filling, providing clean sweetness that allows the cherry flavor to shine. For the crisp topping, brown sugar adds depth with its molasses notes and contributes to that wonderfully chewy, yet crisp, texture. If you’re out of brown sugar, you can use granulated sugar, but the flavor profile will be slightly different.
Thickeners: Cornstarch is absolutely key for a non-runny filling. It works wonders to bind the cherry juices into a beautiful, glossy sauce. If you prefer, an equal amount of tapioca starch can be used as a substitute, but cornstarch is my go-to for its reliability.
Oats and Flour: For the topping, rolled oats (old-fashioned oats) are essential for that classic, hearty texture and nutty flavor. Instant oats can become mushy, so avoid them here. All-purpose flour provides structure and helps create that perfect crumbly consistency. For a gluten-free option, you can use a 1:1 gluten-free baking flour blend.
Fats: Cold butter is non-negotiable for the topping! Cutting cold butter into the dry ingredients creates pockets of butter that melt slowly during baking, resulting in a tender, flaky, and truly crumbly topping. Using softened butter will give you a more uniform, cookie-like topping, which isn’t what we’re aiming for with a crisp.
Flavor Boosters: A splash of vanilla extract always brightens flavors, and in this recipe, it complements the cherries beautifully. But the real secret weapon? Almond extract! Just a touch enhances the natural cherry flavor and adds a gourmet depth that will have everyone asking for your recipe. Don’t skip it if you can help it!
How to Make Cherry Crisp with Frozen Cherries
Follow these step-by-step photos:
1. Prepare the Cherry Filling
In a large bowl, combine your frozen cherries (no need to thaw!), granulated sugar, cornstarch, vanilla extract, and almond extract. Toss gently but thoroughly until the cherries are evenly coated with the sugar and cornstarch mixture. The cornstarch will look like it’s sticking to the frozen bits, and that’s exactly what you want! Pour this mixture evenly into an 8×8 or 9×9 inch baking dish. Ensure the cherries are spread in a single layer as much as possible for even baking.
2. Mix the Crisp Topping
In a separate medium bowl, combine the rolled oats, all-purpose flour, brown sugar, and a pinch of salt. Whisk everything together to ensure an even distribution. Now, cut your very cold butter into small cubes. Add the butter cubes to the dry ingredients. Using your fingers, a pastry blender, or two forks, cut the butter into the mixture until it resembles coarse crumbs with some pea-sized pieces of butter remaining. This texture is crucial for that wonderfully crisp topping, a technique highlighted by experts like King Arthur Baking.
3. Assemble and Bake
Evenly sprinkle the crisp topping over the cherry filling in the baking dish. Don’t press it down; you want it light and airy. Place the baking dish on a baking sheet (to catch any potential spills from the bubbly filling) and bake in a preheated oven at 375°F (190°C). Bake for 40-50 minutes, or until the topping is golden brown and the cherry filling is visibly bubbling around the edges. The bubbling indicates that the filling has thickened properly. Let it cool on a wire rack for at least 15-20 minutes before serving to allow the filling to set further.
Expert Tips for Success
- Do not thaw frozen cherries: This is a key trick! Thawing frozen cherries releases a lot of water upfront, leading to a watery filling. By adding them frozen, they gradually release juices during baking, allowing the cornstarch to thicken properly.
- Use cold butter for the topping: Keep that butter as cold as possible! Cold butter creates pockets of steam as it bakes, which results in a much crispier, flakier topping rather than a dense or chewy one.
- Don’t overmix the topping: Stirring the topping too much can develop the gluten in the flour and melt the butter, leading to a tough rather than crumbly texture. Mix just until combined and crumbly.
- Bake until visibly bubbly: Don’t pull it out too soon! The robust bubbling coming from the cherry filling is your visual cue that the cornstarch has activated and the filling has thickened to that perfect, luscious consistency.
- Let it rest: While it’s tempting to dive in immediately, letting the crisp cool for 15-20 minutes allows the filling to set up completely, preventing it from being too runny when you serve.
What to Serve With Cherry Crisp
This delightful cherry crisp is fantastic on its own, but truly shines with a little accompaniment:
- Vanilla Ice Cream: The classic pairing for a reason! The cold, creamy vanilla melts into the warm, bubbly crisp, creating an absolutely heavenly experience.
- Fresh Whipped Cream: For a lighter, airy touch, a generous dollop of freshly whipped cream adds a wonderful contrast to the dense fruit and crunchy topping.
- Greek Yogurt: For a slightly healthier twist that’s still incredibly delicious, a spoonful of plain or vanilla Greek yogurt offers a creamy, tangy complement.
- A dusting of Powdered Sugar: Simple yet elegant, a light sprinkle of powdered sugar adds a touch of sweetness and a beautiful finish.
Storing and Reheating Your Crisp
Leftover cherry crisp? Lucky you! Here’s how to keep it fresh and delicious:
- Cool completely before storing: This is crucial! If you cover warm crisp, condensation will form, making your beautiful topping soggy. Let it come to room temperature first.
- Store in an airtight container: Once cooled, transfer any leftovers to an airtight container or cover the baking dish tightly with plastic wrap. Store at room temperature for up to 2 days, or in the refrigerator for up to 4-5 days.
- Reheat in oven or microwave: To revive that crisp topping, the oven is your best bet. Preheat to 350°F (175°C) and reheat for 10-15 minutes, or until warmed through and the topping crisps up again. For a quick reheat, the microwave works fine, but the topping won’t be as crunchy.
- Freezing: You can freeze baked and cooled cherry crisp! Wrap it tightly in plastic wrap and then foil. It will last for up to 3 months. Thaw in the refrigerator overnight and then reheat as directed above.
Frequently Asked Questions About Cherry Crisp
Can I use fresh cherries instead of frozen?
How do I prevent a watery cherry crisp?
Can I make this cherry crisp ahead of time?
What kind of cherries are best for crisp?
Cherry Crisp with Frozen Cherries
- Total Time: 1 hour
- Yield: 8 servings
Description
This easy cherry crisp uses frozen cherries for a fuss-free, deliciously thick fruit filling and boasts a perfectly crunchy oat topping. It’s a comforting dessert that everyone will love, perfect for any season.
Ingredients
- 1 (24 ounce) bag frozen cherries (approximately 4–5 cups)
- 1/2 cup granulated sugar (for filling)
- 3 tablespoons cornstarch
- 1 teaspoon vanilla extract
- 1/4 teaspoon almond extract (optional, but highly recommended)
- 1 cup old-fashioned rolled oats
- 1/2 cup all-purpose flour
- 1/2 cup packed light brown sugar
- 1/2 teaspoon ground cinnamon (optional)
- Pinch of salt
- 1/2 cup (1 stick) cold unsalted butter, cut into small cubes
Instructions
- Preheat Oven & Prepare Dish: Preheat oven to 375°F (190°C). Lightly grease an 8×8 or 9×9 inch baking dish.
- Make Cherry Filling: In a large bowl, combine frozen cherries, granulated sugar, cornstarch, vanilla extract, and almond extract. Toss gently until cherries are evenly coated. Pour mixture into the prepared baking dish.
- Prepare Crisp Topping: In a separate medium bowl, combine rolled oats, all-purpose flour, brown sugar, cinnamon (if using), and salt. Add the cold butter cubes. Use your fingers, a pastry blender, or two forks to cut the butter into the dry ingredients until the mixture resembles coarse crumbs with some pea-sized pieces of butter remaining.
- Assemble & Bake: Evenly sprinkle the crisp topping over the cherry filling. Place the baking dish on a baking sheet to catch any drips. Bake for 40-50 minutes, or until the topping is golden brown and the cherry filling is bubbly around the edges.
- Cool & Serve: Let the crisp cool on a wire rack for at least 15-20 minutes before serving. This allows the filling to set properly. Serve warm with vanilla ice cream or fresh whipped cream.
- Prep Time: 15 mins
- Cook Time: 45 mins