
Table of Contents
- My Go-To, Easy Banana Oat Bars Recipe
- Why This Banana Oat Bars Recipe Works
- Ingredients and Smart Substitutions for Banana Oat Bars
- Step-by-Step Instructions: How to Make Banana Oat Bars
- Expert Tips for Perfect Banana Oat Bars Every Time
- What to Serve With Your Banana Oat Bars
- Storing and Reheating Banana Oat Bars
- Frequently Asked Questions About Banana Oat Bars
My Go-To, Easy Banana Oat Bars Recipe
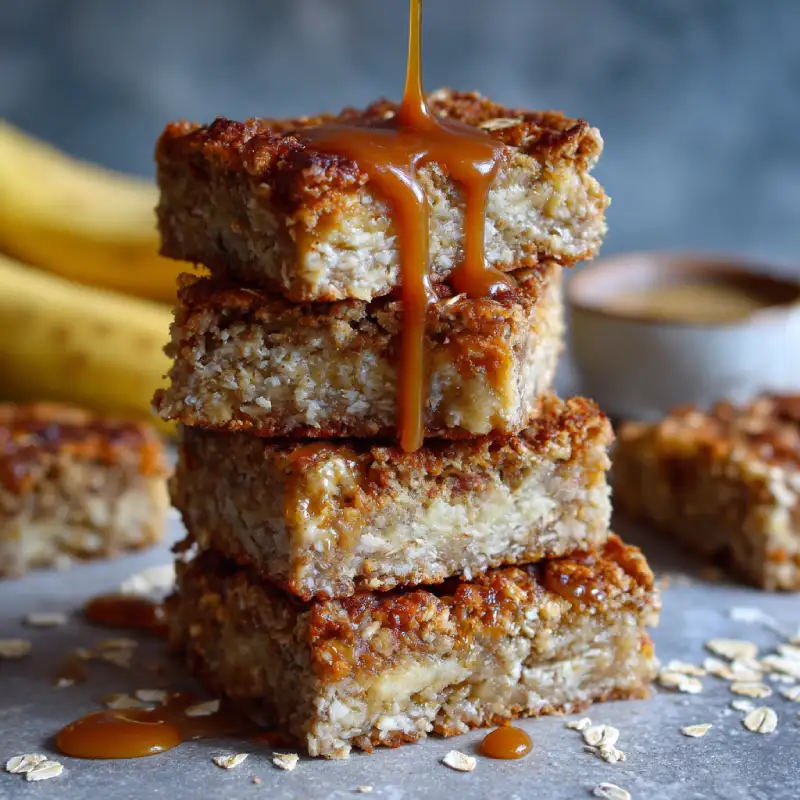
Oh, the humble banana oat bars. They might sound simple, but trust me, these aren’t just any ordinary snack. Imagine a perfectly moist, chewy bar, bursting with natural banana sweetness and the satisfying texture of oats. They’re comforting, versatile, and seriously addictive! Every bite offers that delightful balance of tender fruit and wholesome grains, making them feel like a little hug in food form. You’ll quickly discover why they’ve become my absolute favorite for breakfast, a quick grab-and-go snack, or even a healthier dessert option. For more delightful and easy recipes to brighten your kitchen, see more easy recipes and get inspired!
Why I Love These Banana Oat Bars
I genuinely adore these banana oat bars for so many reasons. First, they embody pure comfort food – that familiar, warm banana bread flavor in a convenient bar form. Second, they’re surprisingly simple to throw together, making them perfect for busy mornings or when you need a quick baking project. And let’s be honest, who doesn’t love a recipe that helps use up those overly ripe bananas sitting on the counter?
Why You Need These in Your Life
If you’re looking for a wholesome, satisfying, and utterly delicious treat that caters to various dietary needs (with easy substitutions, of course!), then these banana oat bars are about to become your new best friend. They’re excellent for meal prep, lunchboxes, or simply to have on hand for when a craving strikes. Plus, they make your house smell incredible while they’re baking – an added bonus!
Why This Banana Oat Bars Recipe Works
This recipe for banana oat bars isn’t just good; it’s foolproof and consistently delivers amazing results. Here’s why it stands out:
- Perfect Chewy Texture: We’ve nailed the ideal balance here, ensuring a bar that’s delightfully chewy without being dense or gummy. The combination of rolled oats and almond flour creates a fantastic bite.
- Naturally Sweetened: By leaning on the sweetness of ultra-ripe bananas and a touch of maple syrup or honey, these bars are sweet enough to satisfy without being overly sugary.
- Quick to Assemble: This isn’t a complex, multi-step baking endeavor. You can have the batter ready and in the oven in under 15 minutes, making it perfect for impromptu baking sessions.
- Versatile & Customizable: This recipe is a fantastic base; it eagerly welcomes your favorite mix-ins, from chocolate chips to nuts, allowing you to personalize every batch.
Ingredients and Smart Substitutions for Banana Oat Bars
Here is what you need and why:
Ripe Bananas: The Sweet Foundation: You absolutely need those spotty, brown-speckled bananas for this recipe. The riper they are, the sweeter and more flavorful your bars will be, acting as a natural sweetener and moisture provider. Don’t use firm, yellow bananas – they won’t provide the same depth of flavor or sweetness.
Rolled Oats: Essential for Texture: Old-fashioned rolled oats are key here. They provide that wonderful chewy texture and hearty structure to the bars. Quick oats can be used in a pinch, but the bars will be softer and less chewy. Steel-cut oats are not suitable for this recipe.
Almond Flour: For Structure and Nuttiness: Almond flour contributes to the tender crumb and adds a lovely nutty flavor. It’s also naturally gluten-free. If you don’t have almond flour, you can use an equal amount of all-purpose flour, though the texture will be slightly different.
Sweetener Options: Maple Syrup or Honey: Both maple syrup and honey are excellent natural sweeteners that complement the banana flavor beautifully. Choose your favorite! You could also use brown sugar for a richer, more caramel-like note, adjusting to taste.
Coconut Oil: For Moisture and Binding: Melted coconut oil adds essential moisture and helps bind the ingredients together. It also contributes a subtle, pleasant coconut flavor. Unsalted butter, melted, is a perfectly fine substitute if you prefer.
Eggs: The Binder: Eggs are crucial for binding all the ingredients, giving the bars structure and preventing them from crumbling. For a vegan option, you can try flax eggs (1 tablespoon ground flaxseed mixed with 3 tablespoons water per egg, let sit for 5 minutes).
Vanilla Extract: Flavor Boost: A good quality vanilla extract enhances all the other flavors in the bars. Don’t skip it!
Baking Powder & Salt: Leavening and Balance: Baking powder provides a little lift, making the bars tender. Salt balances the sweetness and brings out all the flavors. Always use a pinch of salt in your sweet baking!
Optional Add-ins: Chocolate Chips, Nuts, Dried Fruit: This is where you can get creative! Mini chocolate chips, chopped walnuts or pecans, shredded coconut, or even dried cranberries make fantastic additions. Add about 1/2 to 3/4 cup of your favorite mix-ins.
Step-by-Step Instructions: How to Make Banana Oat Bars
Follow these step-by-step instructions for perfect banana oat bars:
1. Preheat and Prep
Preheat your oven to 350°F (175°C). Line an 8×8-inch baking pan with parchment paper, leaving an overhang on two sides to easily lift the bars out later. Lightly grease the parchment paper for extra non-stick insurance.
2. Mash the Bananas
In a large mixing bowl, thoroughly mash your very ripe bananas with a fork until mostly smooth, with a few small lumps remaining for texture. Aim for about 1 cup of mashed banana.
3. Combine Wet Ingredients
To the mashed bananas, add the melted coconut oil (or butter), maple syrup (or honey), eggs, and vanilla extract. Whisk everything together until well combined and smooth. It should look like a thick, creamy batter.
4. Mix Dry Ingredients Separately
In a separate medium bowl, combine the rolled oats, almond flour, baking powder, and salt. Whisk briefly to ensure all the dry ingredients are evenly distributed.
5. Fold Wet into Dry
Pour the wet banana mixture into the bowl with the dry ingredients. Using a spatula, gently fold until just combined. Be careful not to overmix; stop as soon as there are no streaks of dry ingredients remaining. Overmixing can lead to tough bars.
6. Add Optional Mix-ins
If you’re using chocolate chips, nuts, or dried fruit, gently fold them into the batter now. Evenly distribute them throughout the mixture.
7. Transfer to Pan
Pour the batter into your prepared 8×8-inch baking pan. Use the back of a spoon or a spatula to spread the batter evenly into all corners and smooth out the top.
8. Bake Until Golden
Bake for 25-30 minutes, or until the edges are lightly golden brown and a toothpick inserted into the center comes out clean or with moist crumbs, but no wet batter. The bars should feel set when gently pressed.
9. Cool Completely
This is a crucial step! Allow the banana oat bars to cool completely in the pan on a wire rack before attempting to slice them. Cooling ensures they set properly and makes for clean cuts. This might take 1-2 hours.
Expert Tips for Perfect Banana Oat Bars Every Time
- Use Very Ripe Bananas: I can’t stress this enough! The browner, the better. They provide maximum sweetness and moisture, eliminating the need for excessive added sugar.
- Don’t Overmix: Once you combine the wet and dry ingredients, mix just until no dry streaks remain. Overmixing develops the gluten in the flour (even almond flour) and can lead to tougher bars.
- Cool Before Slicing: Seriously, resist the urge to slice them hot! These bars need time to firm up as they cool. Slicing them warm will result in crumbly, messy bars. Patience is a virtue here.
- Adjust Sweetness to Taste: While the recipe provides a good baseline, feel free to slightly increase or decrease the maple syrup/honey based on the sweetness of your bananas and your personal preference.
- For a Healthier Treat, Toast Your Oats: Lightly toasting your rolled oats in a dry pan for a few minutes before adding them to the batter can bring out a deeper, nuttier flavor. King Arthur Baking has a great guide on how to do this perfectly.
What to Serve With Your Banana Oat Bars
These versatile banana oat bars are fantastic on their own, but here are some delightful pairings to truly elevate your experience:
- Coffee or Tea: A classic combination! The warmth of a freshly brewed cup of coffee or your favorite herbal tea complements the wholesome flavors of the bars beautifully.
- Yogurt Parfait: For a more substantial breakfast, crumble a bar over a bowl of Greek yogurt with some fresh berries and a drizzle of honey. It adds amazing texture and flavor.
- Fresh Fruit: A side of sliced apples, berries, or a segment of orange brings a refreshing contrast to the chewy bars, adding lightness and extra nutrients.
- A Scoop of Ice Cream: For a decadent dessert, warm up a bar slightly and serve it with a scoop of vanilla bean ice cream or a dollop of whipped cream. Delicious!
Storing and Reheating Banana Oat Bars
Proper storage ensures your delicious banana oat bars stay fresh and enjoyable for as long as possible!
Room Temperature Storage
If you plan to eat them within 2-3 days, you can store your cooled banana oat bars in an airtight container at room temperature. Place a piece of parchment paper between layers if stacking to prevent sticking.
Refrigeration for Longer Shelf Life
For extended freshness (up to a week), store the bars in an airtight container in the refrigerator. The coolness will help them stay moist and prevent them from spoiling.
Freezing Instructions
These bars freeze wonderfully! Once completely cooled, wrap individual bars tightly in plastic wrap, then place them in a freezer-safe bag or container. They can be frozen for up to 2-3 months. Freezing individually makes it easy to grab just one at a time!
Reheating Tips
From the fridge, you can enjoy them cold, or warm them gently in the microwave for 15-30 seconds for a softer, just-baked feel. From frozen, thaw overnight in the refrigerator, or microwave for 30-60 seconds until warmed through.
Frequently Asked Questions About Banana Oat Bars
Can I make these gluten-free?
Can I use quick oats?
How ripe should the bananas be?
Can I add protein powder?
Delicious Banana Oat Bars
- Total Time: 45 minutes
- Yield: 9-12 bars
Description
These delightful banana oat bars are chewy, moist, and packed with natural banana sweetness. Perfect for a wholesome breakfast, snack, or healthier dessert option.
Ingredients
- 2 very ripe medium bananas, mashed (about 1 cup)
- 1/4 cup melted coconut oil (or unsalted butter)
- 1/4 cup maple syrup or honey
- 1 large egg
- 1 teaspoon vanilla extract
- 1 1/2 cups old-fashioned rolled oats (certified gluten-free if needed)
- 1/2 cup almond flour
- 1 teaspoon baking powder
- 1/2 teaspoon salt
- 1/2 cup optional add-ins (chocolate chips, chopped nuts, dried fruit)
Instructions
- Preheat oven to 350°F (175°C). Line an 8×8 inch baking pan with parchment paper.
- In a large bowl, mash ripe bananas until mostly smooth.
- Stir in melted coconut oil, maple syrup/honey, egg, and vanilla extract until well combined.
- In a separate bowl, whisk together rolled oats, almond flour, baking powder, and salt.
- Add dry ingredients to wet ingredients and fold gently until just combined. Do not overmix.
- Fold in any optional add-ins like chocolate chips or nuts.
- Spread batter evenly into the prepared baking pan.
- Bake for 25-30 minutes, or until golden brown and a toothpick inserted into the center comes out clean.
- Let cool completely in the pan on a wire rack before slicing and serving.
- Prep Time: 15 mins
- Cook Time: 30 mins