
Banana Bread with Self Rising Flour: Easy Recipe
Are you ready for the easiest, most unbelievably moist, and utterly delicious banana bread you’ve ever baked? Forget complex recipes and multiple leavening agents – today, we’re unlocking the magic of banana bread with self rising flour. This isn’t just a recipe; it’s a revelation, delivering a perfectly fluffy crumb, a golden-brown crust, and a flavor that will have your family asking for more, guaranteed. Say goodbye to dense, dry loaves and hello to your new go-to banana bread, ready to be devoured fresh from the oven.
Table of Contents
- Introduction: Your Go-To Self-Rising Flour Banana Bread
- How This Self-Rising Flour Banana Bread Recipe Works
- Ingredients and Substitutions for the Best Banana Bread
- How to Make Your Perfect Loaf
- Expert Tips for Self-Rising Flour Banana Bread Success
- What to Serve with Self-Rising Flour Banana Bread
- Storing and Reheating Your Banana Bread
- Self-Rising Flour Banana Bread FAQ
Introduction: Your Go-To Self-Rising Flour Banana Bread
There’s nothing quite like the comforting aroma of freshly baked banana bread wafting through the house. But what if I told you there’s a secret ingredient that makes this classic treat even easier and more consistently perfect? Enter self-rising flour! It truly is a game-changer for banana bread, eliminating the need for separate baking powder and salt, simplifying your baking process, and delivering a remarkably tender crumb every single time. My family absolutely adores this version; it’s become a staple in our home, often disappearing within hours of coming out of the oven. If you’re looking for an effortless way to achieve bakery-quality results, this banana bread with self rising flour recipe is about to become your new best friend. You can See more good recipes here to find other fantastic baking ideas!
Why Self-Rising Flour is a Game-Changer for Banana Bread
The beauty of self-rising flour lies in its convenience. It’s simply all-purpose flour that already has baking powder and salt pre-mixed in the perfect proportions. This means less measuring for you, fewer chances for error, and a more streamlined baking experience. For banana bread, this translates to guaranteed lift and a beautifully even texture without any fuss. It takes so much guesswork out of the equation!
My Family’s Favorite Banana Bread
This isn’t just any banana bread recipe; it’s the one my kids beg for, the one I bring to potlucks that always gets rave reviews, and the one that cures any sweet craving. Its simplicity and incredible flavor make it a consistent winner. It’s comforting, satisfying, and utterly delicious – truly a family favorite!
How This Self-Rising Flour Banana Bread Recipe Works
- Perfectly Moist & Tender Crumb: The combination of mashed ripe bananas and the precisely balanced leavening in self-rising flour creates an incredibly moist, melt-in-your-mouth texture. We also use melted butter for uniform distribution and richness.
- Golden Brown Crust Every Time: A slightly higher sugar content (balanced by the bananas!) contributes to a gorgeous caramelized crust that’s both appealing and adds another layer of flavor.
- Naturally Sweet & Flavorful: We lean heavily on very ripe bananas for natural sweetness and their signature aroma, complemented by a touch of vanilla for warmth.
- Quick and Easy Prep (No Leavening Agents Needed!): This is the major advantage! As mentioned, self-rising flour contains both baking powder and salt, streamlining your ingredient list and reducing measuring steps, making one-bowl cleanup even more attainable.
Ingredients and Substitutions for the Best Banana Bread
Here is what you need and why:
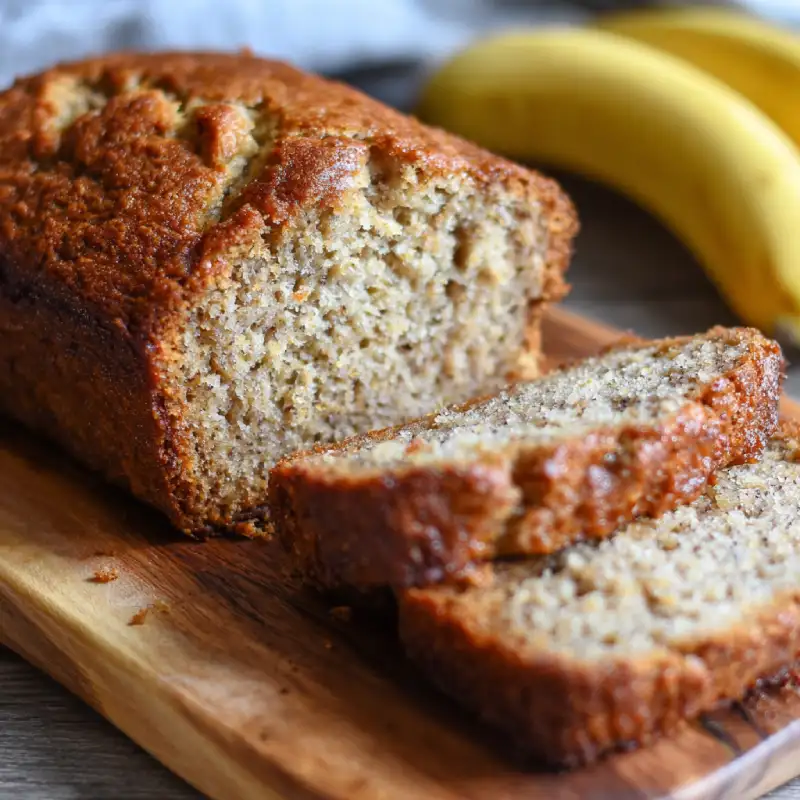
Ripe Bananas (The Sweetness Factor): This is non-negotiable! You need very ripe bananas—think brown spots galore, even almost black. They are softer, easier to mash, and packed with natural sugar and intense banana flavor. Under-ripe bananas will result in a less flavorful and potentially drier bread.
Self-Rising Flour (The All-in-One Solution): The star of our show! This flour already contains baking powder and salt, ensuring perfect lift and seasoning. Do NOT substitute with all-purpose flour without adding your own leavening agents (about 1.5 tsp baking powder and 1/4 tsp salt per cup of flour).
Granulated Sugar (Balancing Sweetness and Moisture): While bananas provide sweetness, a touch of granulated sugar enhances the overall flavor, helps with browning, and contributes to the bread’s moistness. You can slightly reduce it if your bananas are extremely ripe, but I recommend sticking to the recipe for the best texture.
Large Eggs (Binding and Structure): Eggs act as a binder, holding the batter together and providing structure as the bread bakes. They also contribute to the richness and a slightly airy texture. Make sure they are at room temperature for better emulsification.
Unsalted Butter (Flavor and Tenderness): Melted butter adds incredible richness and moisture, resulting in a tender crumb. Using unsalted butter allows you to control the salt content in the recipe. If using salted butter, reduce the recipe’s added salt (though with self-rising flour, you likely won’t add any extra salt).
Milk (Moisture and Texture): A splash of milk helps to achieve the perfect batter consistency and adds extra moisture, ensuring a delightfully tender loaf. Any type of milk (dairy or non-dairy) will work here.
Vanilla Extract (Enhancing Flavor): A classic addition that complements the banana flavor beautifully, adding warmth and depth. Use pure vanilla extract for the best results.
Optional Mix-Ins (Nuts, Chocolate Chips): Feel free to customize! Chopped walnuts or pecans add a wonderful crunch, while chocolate chips (milk, semi-sweet, or dark) make it an extra special treat. You could also try cinnamon, shredded coconut, or dried cranberries. King Arthur Baking offers some great insights into banana bread variations!
How to Make Your Perfect Loaf
Follow these step-by-step photos:
1. Preheat and Prep
Start by preheating your oven to 350°F (175°C). Grease and flour a 9×5-inch loaf pan, or line it with parchment paper, leaving an overhang on the sides for easy removal. This ensures your beautiful loaf doesn’t stick!
2. Mash the Bananas
In a large mixing bowl, thoroughly mash your very ripe bananas with a fork or potato masher until mostly smooth with a few small lumps remaining. This is where all that fantastic banana flavor comes from!
3. Combine Wet Ingredients
To the mashed bananas, add the melted butter, granulated sugar, beaten eggs, milk, and vanilla extract. Whisk everything together until well combined and smooth. It should look like a thick, creamy banana mixture.
4. Fold in Self-Rising Flour
Gradually add the self-rising flour to the wet ingredients. Using a spatula or wooden spoon, gently fold the flour into the mixture until *just* combined. Do not overmix! A few streaks of flour are perfectly fine. Overmixing develops the gluten, leading to a tough bread.
5. Add Mix-ins (Optional) and Bake
If using, gently fold in your optional mix-ins like chocolate chips or chopped nuts. Pour the batter evenly into your prepared loaf pan. Bake for 55-65 minutes, or until a wooden skewer or toothpick inserted into the center comes out clean or with moist crumbs, but no wet batter.
6. Cool and Serve
Once baked, remove the loaf from the oven and let it cool in the pan for about 10-15 minutes. Then, carefully lift it out using the parchment paper overhang (or invert onto a wire rack) and let it cool completely on a wire rack before slicing. Cooling completely allows the internal structure to set and prevents the bread from crumbling.
Expert Tips for Self-Rising Flour Banana Bread Success
- Don’t Overmix the Batter: This is crucial! Overmixing develops gluten, which can lead to a tough and dense banana bread. Mix only until the flour streaks disappear.
- Use Very Ripe Bananas: The browner, the better! Ripe bananas are sweeter, more flavorful, and easier to mash, contributing significantly to the bread’s moistness and taste.
- Grease and Flour Your Pan Properly: Or use parchment paper for easy removal. This prevents sticking and ensures your beautiful loaf comes out in one piece.
- Adjust Baking Time for Your Oven: Ovens vary, so the baking time is a guideline. Start checking for doneness around 50 minutes. If the top is browning too quickly, loosely tent it with aluminum foil.
- Cool Completely Before Slicing: While tempting to slice warm, letting the bread cool fully (preferably for at least an hour or two) helps it set, preventing crumbling and ensuring the best texture.
What to Serve with Self-Rising Flour Banana Bread
This versatile bread is delicious on its own, but here are some ideas to elevate the experience:
- Classic Pairings: A warm slice is perfect with a hot cup of coffee, a soothing mug of tea, or a tall glass of cold milk.
- Breakfast/Brunch Ideas: Serve it alongside fresh fruit, a dollop of Greek yogurt, or even toasted with a smear of cream cheese. It’s delightful for a lazy weekend breakfast.
- Dessert Options: Warm it slightly and serve with a scoop of vanilla ice cream, a drizzle of caramel sauce, or a sprinkle of cinnamon sugar.
Storing and Reheating Your Banana Bread
Proper storage ensures your delicious banana bread with self rising flour stays fresh and moist for as long as possible:
- Room Temperature Storage: Store in an airtight container or wrapped tightly in plastic wrap at room temperature for up to 3-4 days. This helps maintain its moisture.
- Refrigeration for Longer Shelf Life: If you need it to last longer, you can refrigerate it in an airtight container for up to a week. The texture might become slightly firmer, but it will still be delicious.
- Freezing for Future Enjoyment: Banana bread freezes beautifully! Wrap individual slices or the whole loaf tightly in plastic wrap, then an extra layer of aluminum foil. Freeze for up to 3 months.
- Best Reheating Methods: From room temperature, a quick zap in the microwave (10-20 seconds per slice) or a few minutes in a toaster oven will warm it perfectly. From frozen, thaw overnight in the refrigerator, then warm as desired.
Self-Rising Flour Banana Bread FAQ
Can I use regular flour instead of self-rising?
Yes, but you’ll need to add your own leavening agents. For every cup of all-purpose flour, add 1.5 teaspoons of baking powder and 1/4 teaspoon of salt. So if the recipe calls for 2 cups of self-rising flour, you would use 2 cups of all-purpose flour + 3 teaspoons of baking powder + 1/2 teaspoon of salt.
What if my bananas aren’t ripe enough?
If your bananas aren’t ripe enough, you can ripen them quickly! Place them on a baking sheet and bake at 300°F (150°C) for 15-30 minutes, or until the peels are black and shiny. Let them cool before mashing. This intensifies their sweetness and makes them easier to mash.
How do I know when the banana bread is done?
The best way to tell is to insert a wooden skewer or toothpick into the center of the loaf. If it comes out clean or with only a few moist crumbs attached (no wet batter), it’s done. The top should also be golden brown and spring back when lightly touched.
Can I add other spices?
Absolutely! Cinnamon, nutmeg, or a touch of allspice work wonderfully with banana bread. Start with 1/2 teaspoon of ground cinnamon or 1/4 teaspoon of nutmeg and adjust to your preference.
Is this recipe dairy-free/gluten-free adaptable?
For dairy-free, simply substitute plant-based milk (almond, soy, oat) and use vegan butter or oil. For gluten-free, you’d need a self-rising gluten-free flour blend, but results can vary, as gluten-free flours behave differently. Always check the specific recommendations for your gluten-free flour blend.
Easy Self-Rising Flour Banana Bread
- Total Time: 1 hour 15 minutes
- Yield: 1 loaf (10-12 slices)
Description
Unlock the secret to incredibly moist and flavorful banana bread with this simple recipe using self-rising flour. It’s quick to prepare and delivers a tender, golden loaf every time.
Ingredients
- 3–4 very ripe large bananas, mashed (about 1.5 cups)
- 1/2 cup (113g) unsalted butter, melted
- 3/4 cup (150g) granulated sugar
- 2 large eggs, lightly beaten
- 1/4 cup (60ml) milk (any kind)
- 1 teaspoon pure vanilla extract
- 2 cups (240g) self-rising flour
- Optional: 1 cup chocolate chips, chopped nuts (walnuts, pecans), or other mix-ins
Instructions
- 1. Preheat Oven & Prep Pan: Preheat oven to 350°F (175°C). Grease and flour a 9×5-inch loaf pan or line with parchment paper.
- 2. Mash Bananas: In a large bowl, mash ripe bananas until mostly smooth.
- 3. Combine Wet Ingredients: Add melted butter, sugar, beaten eggs, milk, and vanilla extract to the mashed bananas. Whisk until well combined.
- 4. Add Flour: Gradually add self-rising flour to the wet ingredients. Gently fold with a spatula until *just* combined; do not overmix.
- 5. Fold in Mix-Ins (Optional): If using, gently fold in chocolate chips or nuts.
- 6. Pour & Bake: Pour batter into the prepared loaf pan. Bake for 55-65 minutes, or until a toothpick inserted into the center comes out clean.
- 7. Cool & Serve: Let cool in the pan for 10-15 minutes, then transfer to a wire rack to cool completely before slicing.
- Prep Time: 15 mins
- Cook Time: 60 mins