
Peanut Butter and Chocolate Rice Crispy Bars: Delicious Recipe
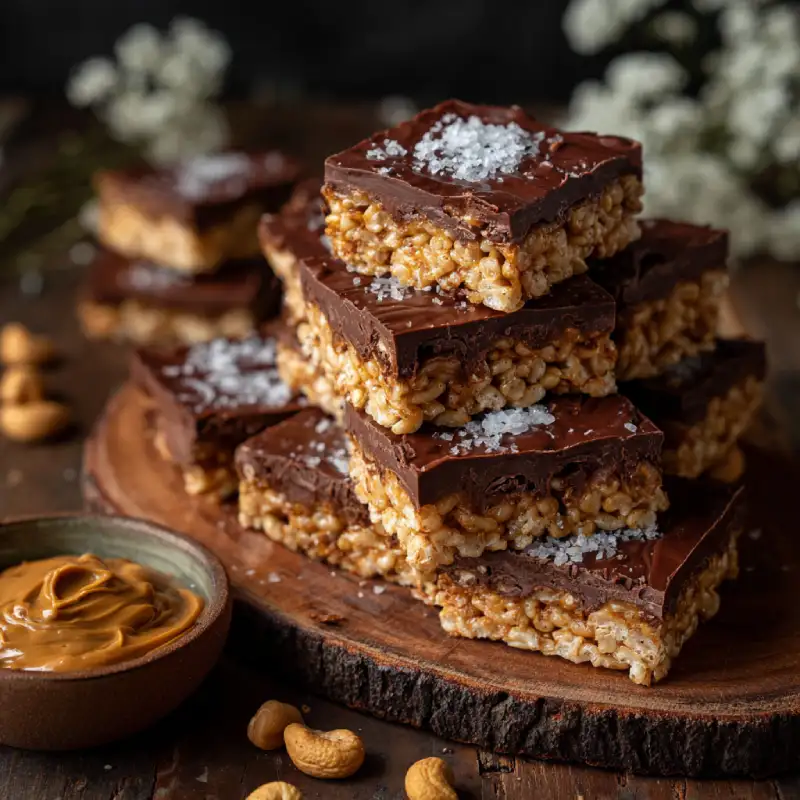
Oh, the nostalgia! There’s something truly magical about the crispy-chewy goodness of a classic Rice Crispy Bar. But what if I told you we could elevate that beloved childhood treat into an absolute masterpiece, bringing together the irresistible duo of peanut butter and chocolate? Get ready for a symphony of textures – the satisfying snap of crispy rice cereal, the creamy, melt-in-your-mouth richness of peanut butter, and a luscious, decadent chocolate topping that sets just perfectly. This isn’t just a recipe; it’s a journey back to simpler times with a gourmet twist. If you’re looking for a delightful no-bake dessert that’s quick to make and impossible to resist, you’ve found your new favorite! See more good recipes here
Table of Contents
Introduction: A Childhood Favorite, Reimagined
As a seasoned home baker, I’ve always had a soft spot for no-bake treats, and these peanut butter and chocolate rice crispy bars are truly my go-to. They effortlessly blend the comforting familiarity of a classic Rice Crispy treat with the sophisticated flavors of rich peanut butter and smooth chocolate. This recipe isn’t just easy, it’s foolproof, making it a winner for busy weeknights, last-minute gatherings, or when you simply crave something sweet without firing up the oven. The balance of salty peanut butter with sweet chocolate and the delightful crunch of crisp rice cereal creates an experience that’s both comforting and incredibly satisfying.
How This Recipe Works: Achieving Crispy Perfection
Crafting the perfect peanut butter and chocolate rice crispy bars involves a careful understanding of how each ingredient contributes to the final, delectable result.
- The Ideal Marshmallow-to-Cereal Ratio for Perfect Chewiness: We use just the right amount of marshmallows to bind the cereal without making it sticky or overly sweet. The goal is a bar that’s chewy but still holds its shape beautifully.
- Creamy Peanut Butter Infusion for Rich Flavor: Integrating peanut butter directly into the melted marshmallow mixture ensures every single bite is infused with that irresistible nutty flavor, creating a cohesive and deeply satisfying base.
- Decadent Chocolate Topping That Sets Just Right: The magic of this recipe lies not just in the peanut butter base, but also in the glossy, firm-setting chocolate layer on top. Thanks to a touch of coconut oil, the chocolate sets up beautifully, giving you a satisfying snap without being brittle, and it won’t melt all over your fingers at room temperature.
- No-Bake Brilliance: Forget the oven! This recipe utilizes simple stovetop melting, making it accessible and fast, bringing deliciousness to your table in under an hour.
Ingredients and Smart Substitutions
Here is what you need and why:
| Ingredient | Why It Matters | Smart Substitutions |
|---|---|---|
| Rice Cereal | The star of the show, providing that signature crispy texture. | Look for gluten-free options if needed. Any puffed rice cereal will work, but the classic brand is tried and true. |
| Unsalted Butter | Adds richness and helps the marshmallows melt smoothly. Unsalted gives you control over the overall saltiness. | Salted butter can be used; just reduce any added salt in the recipe if you usually add it. Margarine can be used for dairy-free. |
| Mini Marshmallows | They melt more quickly and evenly than large marshmallows, ensuring a smooth, cohesive binder. | Large marshmallows cut into smaller pieces will work. For vegan, use vegan mini marshmallows (e.g., Dandies). |
| Creamy Peanut Butter | The heart of the flavor, adding a rich, nutty depth and chewiness. | Natural peanut butter can be used, but it might make the bars a little softer. Chunky peanut butter adds texture. For nut-free, sunflower seed butter (SunButter) or almond butter works great! |
| Semi-Sweet Chocolate Chips | Provides a balanced sweetness and classic chocolate flavor for the topping. | Dark chocolate chips for a less sweet, more intense flavor, or milk chocolate for a sweeter, creamier finish. White chocolate can also be used. |
| Coconut Oil (Refined) | The secret ingredient for a perfectly smooth, glossy chocolate topping that sets firm but isn’t hard, and doesn’t melt easily at room temperature. Refined coconut oil has no coconut flavor. | A tiny bit of vegetable shortening can be used in a pinch, but coconut oil yields the best results. |
| Vanilla Extract (Optional) | A touch of vanilla enhances all the other flavors. | Not strictly necessary, but highly recommended for depth of flavor. |
Step-by-Step Instructions: Your Visual Guide
Follow these step-by-step instructions to create perfect peanut butter and chocolate rice crispy bars:
1. Prep Your Pan
Line a 9×13-inch baking pan with parchment paper, leaving an overhang on the sides to use as handles later. Lightly grease the parchment paper and the exposed sides of the pan with cooking spray or butter. This is crucial for easy removal!
2. Melt Butter and Marshmallows
In a large, heavy-bottomed pot or Dutch oven, melt the butter over low heat. Once melted, add the mini marshmallows and stir continuously until they are completely melted and smooth. Keep the heat low to prevent the marshmallows from becoming stiff or burning.
3. Incorporate Peanut Butter
Remove the pot from the heat. Add the creamy peanut butter to the melted marshmallow mixture. Stir vigorously until it’s fully incorporated and the mixture is smooth and uniform. If using vanilla extract, add it now.
4. Fold in Rice Cereal
Add the rice cereal to the peanut butter-marshmallow mixture. Using a buttered spatula or wooden spoon, gently fold the cereal into the mixture until it’s evenly coated. Work quickly before the mixture cools too much.
5. Press into Pan
Transfer the cereal mixture to your prepared pan. Using the back of a buttered spoon or your buttered hands (or another piece of parchment paper), press the mixture down firmly and evenly into the pan. Don’t press too hard, or the bars will be overly dense; aim for firm but not rock-hard.
6. Melt Chocolate Topping
In a microwave-safe bowl, combine the chocolate chips and coconut oil. Microwave in 30-second intervals, stirring well after each, until smooth and completely melted. Alternatively, melt over a double boiler, stirring until smooth.
7. Spread Chocolate
Pour the melted chocolate mixture evenly over the pressed rice crispy layer. Spread it gently with an offset spatula or the back of a spoon to create a smooth, consistent top layer.
8. Chill to Set
Place the pan in the refrigerator for at least 30-60 minutes, or until the chocolate topping is completely set and firm. Patience here ensures clean, beautiful cuts.
Expert Tips for Success
- Don’t Overcook the Marshmallows: The key to chewy, not hard, bars is melting marshmallows over low heat and stirring constantly. High heat can toughen them.
- Grease Everything: Seriously, grease your spatula, your hands, and especially the parchment paper. This sticky situation turns into an easy one with a little butter or cooking spray.
- Use Fresh Marshmallows: Older, stale marshmallows don’t melt as smoothly and can result in a tougher bar texture.
- Cool Completely Before Cutting: Rushing to cut warm bars will result in a messy, crumbling disaster. Allow the bars to chill thoroughly for clean, sharp edges.
- Adjust Sweetness: If you prefer less sweet, consider using dark chocolate for the topping. The peanut butter-cereal base is already perfectly balanced!
- Mix Gently: When incorporating the cereal, fold it in rather than stirring vigorously to avoid crushing the crispy bits.
- Clean Cuts: For perfectly clean cuts, use a sharp, warm knife (run it under hot water and dry it between cuts).
What to Serve With Your Bars
These incredibly delicious peanut butter and chocolate rice crispy bars are fantastic on their own, but here are a few ideas to elevate the experience:
- A Glass of Cold Milk: The classic pairing! The creamy milk perfectly complements the rich flavors of the bars.
- Alongside Coffee or Tea: For an adult treat, these bars are wonderful with a warm cup of coffee or a comforting mug of hot tea.
- As a Simple Dessert: They stand alone beautifully as a satisfying end to any meal, especially when you need something sweet without getting too elaborate.
- With a Scoop of Vanilla Ice Cream: A warm (just slightly) bar paired with cold vanilla ice cream is an absolute dream combination.
Storing and Reheating
Proper storage is key to keeping your peanut butter and chocolate rice crispy bars fresh and delicious!
- Storing at Room Temperature: For optimal texture, store your bars in an airtight container at room temperature for up to 3-4 days. This keeps them perfectly chewy. Avoid direct sunlight or warm spots.
- Freezing for Longer Shelf Life: These bars freeze beautifully! Wrap individual bars tightly in plastic wrap, then place them in an airtight, freezer-safe container or bag. They will keep for up to 2-3 months. Thaw at room temperature for about 30 minutes before enjoying.
- Avoiding the Microwave: While tempting, microwaving these bars can make them overly gooey and soft, potentially losing their crispy texture. It’s best to enjoy them at room temperature or slightly chilled.
Frequently Asked Questions (FAQ)
Why are my peanut butter and chocolate rice crispy bars too hard?
Can I make these vegan?
How far in advance can I make these?
What’s the best way to cut them cleanly?
Peanut Butter and Chocolate Rice Crispy Bars
- Total Time: 20 minutes
- Yield: 16 bars (9x13 inch pan)
Description
Indulge in this delightful no-bake treat combining crispy rice cereal, creamy peanut butter, and a luscious chocolate topping. A perfect reinvented childhood classic, ideal for any sweet craving.
Ingredients
- 6 cups Rice Cereal
- 1/2 cup Unsalted Butter
- 1 (10 ounce) bag Mini Marshmallows
- 1 cup Creamy Peanut Butter
- 1 teaspoon Vanilla Extract (optional)
- 1 cup Semi-Sweet Chocolate Chips
- 1–2 tablespoons Refined Coconut Oil
Instructions
- Line a 9×13-inch pan with parchment paper, allowing overhang, and grease lightly.
- Melt butter in a large pot over low heat. Add marshmallows and stir until completely smooth.
- Remove from heat. Stir in peanut butter and vanilla (if using) until well combined.
- Gently fold in rice cereal until evenly coated.
- Press mixture firmly and evenly into the prepared pan.
- In a microwave-safe bowl, melt chocolate chips and coconut oil in 30-second intervals until smooth.
- Spread melted chocolate evenly over the cereal layer.
- Chill in the refrigerator for at least 30-60 minutes, or until the chocolate is set. Cut into squares and serve.
- Prep Time: 15 minutes
- Cook Time: 5 minutes